Easy Trinidad Sada Roti Recipe – Perfect for Beginners!

 Hoorah for World Bread Day! It’s been two years since I last participated, and I was determined not to miss the deadline this time around. Hosted each year by Kochtopf, World Bread Day aims to highlight bakers and bread recipes from around the world. Around this time of year, the food blogosphere proliferates with temperate climate autumn recipes. Pumpkin bread recipes especially abound, and, for a moment or two, I was tempted to give one or two of them a try. That was until a hankering for curry created a simultaneous craving for sada roti, and voila! I could kill two birds with one stone! 😀
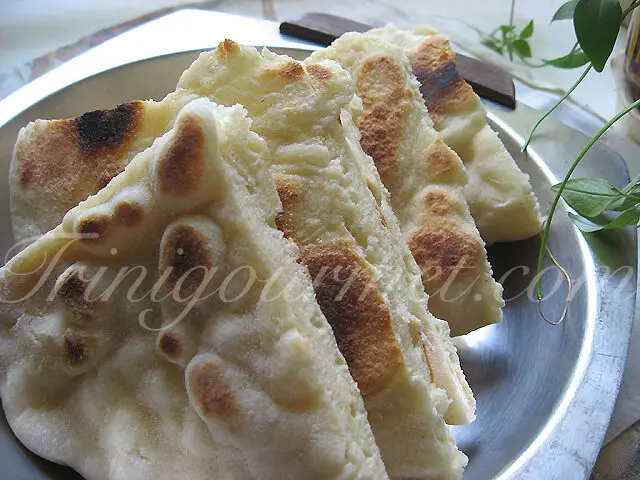
So, what is sada roti? Well, all Trini readers out there already know the answer to this question; however, for those who are not aware sada roti is one of the simplest types of Trinidadian roti (flatbread). Unlike paratha or dhalpuri, it doesn’t require oil, butter, or fillings. It’s a plain, yeast-free bread, but don’t let its simplicity fool you—when done right, it’s soft, slightly chewy, and perfect for soaking up all the rich flavours of Caribbean curries and chokas.
According to Wikipedia:
“Sada Roti: This is a plain roti, made of white flour. Because it is the simplest roti to make, it is the most commonly consumed roti in Trinidad. It is a popular breakfast option in Trinidad, in combination with tomato choka, baigan choka (eggplant), and other vegetable dishes.”
From start to finish, this is a pretty straightforward recipe. The main thing to monitor is the texture of the dough. You want it silky, smooth, and elastic. You also want to make sure that the tawa is at a good steady heat. I really wanted to try the “sakay” step that Chennette used in her excellent roti Flickr set, but alas, it does not appear to work with electric stoves… Still, everything tasted great, and I didn’t experience any of the raw dough spots that the ‘sakay’ is supposed to eliminate. Still, I wouldn’t have minded seeing the balloon effect 😆
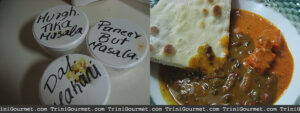
Later that day, J and I enjoyed my endeavour with some insanely delicious curries from my latest obsession, Tandoori Hut in Shoppes of Maraval. More on them soon! 🙂

Understanding Sada Roti
Sada roti is a staple in Trinidadian cuisine, cherished for its simplicity and versatility. This plain, soft flatbread is akin to naan and is traditionally enjoyed with various dishes like tomato choka and baigan choka. Its origins trace back to Indian indentured labourers who brought this culinary tradition to the Caribbean, making it an integral part of Trinidad and Tobago’s food culture.
Ingredients for Easy Sada Roti
You only need four basic ingredients to make sada roti:
- 2 cups all-purpose flour
- 2 tsp baking powder
- ½ tsp salt
- ¾ cup warm water (adjust as needed)
That’s it! No yeast, no complicated techniques—just a few pantry staples and a bit of patience.
Recommended Equipment:
- Mixing bowl
- Rolling pin (belna)
- Flat griddle (tawa) or skillet
If you don’t have a tawa, a flat cast-iron skillet works well as an alternative.
Product Recommendations
Here are some helpful tools to make your sada roti-making experience even easier:
- Tawa (Griddle Pan) – Perfect for evenly cooking sada roti. Check it out here
- Stainless Steel Rolling Pin (belna) – Helps you achieve a smooth, even dough. Check it out here
- Kitchen Dough Scraper – Great for handling and portioning dough. Check it out here
- High-Heat Spatula – Ideal for flipping roti without tearing. Check it out here
If you’ve ever felt intimidated by homemade roti, let me reassure you: you don’t need to be an expert to make this! This recipe is simple, forgiving, and designed for absolute beginners. And even if your first few tries aren’t perfect, they’ll still be delicious.
So, grab your flour and tawa—let’s make sada roti together!
Step-by-Step Guide to Making Easy Sada Roti
Preparing the Dough
- In a medium bowl, combine the flour, baking powder, and salt.
- Gradually add water until the mixture forms a shaggy dough.
- Knead with your hands until the dough is smooth, medium-soft, and not sticky, about 3 to 4 minutes.
Resting the Dough
- Cover the dough and set it aside at room temperature for at least 15-30 minutes. This resting period allows the gluten to relax, making the dough easier to work with.
Dividing and Shaping
- Divide the dough into four equal pieces.
- Shape each piece into a smooth ball by rolling it between your palms, applying gentle pressure to eliminate cracks.
- Cover the dough balls loosely with a cloth and let them rest for another 5-10 minutes.
Rolling Out the Roti
- On a lightly floured surface, press each dough ball into a small flat circle (about 4 inches).
- Using a rolling pin, roll the dough, flipping and rotating, until it becomes an even 9-inch round, approximately ¼ inch thick. Don’t worry if it’s not perfectly round; it will still taste delicious.
Cooking on the Tawa
Heat the tawa or skillet over medium heat until hot.
Keeping the Roti Soft
- Remove the cooked roti from the tawa, dust off any excess flour, and wrap it immediately in a clean, dry cloth or kitchen towel. This helps to keep the roti soft and pliable.

Ingredients
Method
- Mix dry ingredients together in a bowl.
- Add water gradually, mixing until soft and pliable into a smooth dough.
- Knead well and place into a greased bowl.
- Pour oil into the palms of your hand and rub over dough
- Cover with damp cloth and leave for 30 minutes
- Divide dough into four pieces and shape into round balls.
- Rest for another 30 minutes
- Roll each ball of dough on a floured board into a flat round shape, ½ inch thick.
- Heat tawa over medium flame until moderately hot
- Place one roti on tawa until it rises, bubbles appear and underside is lightly browned with flecks.
- Turn to other side and cook.
- Cut into quarters
Troubleshooting: Why Didn’t My Sada Roti Puff?
Even experienced cooks sometimes struggle to get that perfect ballooning effect. Here are a few common reasons why your sada roti might not puff up:
- Dough wasn’t kneaded enough – Kneading develops gluten, which helps with puffing.
- Dough was too dry – If there’s not enough moisture, the air pockets won’t form.
- Tawa wasn’t hot enough – A steady, high heat is crucial for the puffing effect.
- Roti wasn’t rolled evenly – Thin spots cook too quickly, preventing proper inflation.
Even if your roti stays flat, don’t stress—it will still be soft, delicious, and perfect for scooping up your favourite dishes!
Remember, every attempt at making sada roti is a step forward in your culinary journey. Celebrate your efforts and enjoy the process. Even if your roti isn’t perfect, it’s homemade and made with love!
Serving and Enjoying Sada Roti
Traditional Accompaniments:
Sada roti is incredibly versatile and pairs beautifully with a range of Trinidadian dishes. Some of my favourite accompaniments include:
- Tomato Choka – Roasted tomatoes mashed with garlic, onions, and a hint of pepper for a smoky, savoury kick.
- Baigan Choka (Eggplant Choka) – Roasted eggplant blended with garlic and onions, creating a smooth and deeply flavoured dish.
- Fried Aloo (Potato) – A simple yet satisfying side, made by sautéing potatoes with garlic, onions, and turmeric.
- Saltfish Buljol – A delicious mix of shredded saltfish, tomatoes, onions, and fresh herbs, offering a salty, savoury contrast to the soft roti.
- Curry Channa (Chickpeas) – A comforting and protein-packed curry that complements sada roti perfectly.
Modern Twists:
Sada roti is a blank canvas, making it easy to experiment with different flavours. If you’re looking for a unique take, try:
- Sada Roti with Avocado Smash – A Caribbean take on avocado toast, topped with fresh herbs and chilli flakes.
- Sada Roti Pizza – Use a sada roti as a base, spread tomato sauce, cheese, and your favourite toppings, then toast it lightly in the oven.
- Sada Roti Wraps – Stuff your roti with grilled chicken, fresh vegetables, and a drizzle of tamarind sauce for a quick and delicious meal.
FAQs About Making Easy Sada Roti
- Can I make sada roti ahead of time?
Yes! You can prepare the dough in advance and store it in the fridge for up to 24 hours. Just let it come to room temperature before rolling and cooking.
- Why isn’t my sada roti puffing up?
This could be due to several factors: the dough might be too dry, the heat might not be high enough, or the roti may not have been rolled evenly. Keep practising—it gets easier with time!
- Can I freeze sada roti?
Absolutely! Cooked sada roti freezes well. Stack them with parchment paper between each piece and store in an airtight container. To reheat, warm them on a tawa or skillet for a few minutes.
- Can I make sada roti gluten-free?
Yes! Try using a gluten-free all-purpose flour blend. The texture may be slightly different, but it will still be delicious.
Bringing It All Together
There’s nothing quite like the joy of homemade sada roti. It’s more than just a recipe—it’s a tradition, a connection to our roots, and a way to bring a little taste of home into every meal. Whether you’re making it for the first time or the hundredth, each batch carries a story of love and comfort.
And if you have a sweet tooth, why not explore more Trini flavours? Download my free ebook, “7 Sweet Trini Treats”, and bring even more island magic to your kitchen!


